How To Draw Hello Kitty: A Step-by-Step Guide For Beginners
Hello Kitty is an iconic character beloved by children and adults alike. Whether you're an aspiring artist or just looking for a fun activity, learning how to draw Hello Kitty can be an enjoyable experience. In this article, we will explore the steps to create your own Hello Kitty drawing, along with tips and tricks to enhance your skills. Whether you're drawing for personal enjoyment or planning to share your artwork with friends, this guide will provide you with everything you need to know.
As we delve into the world of Hello Kitty, we will break down the drawing process into manageable steps. This will help you understand the proportions and features of Hello Kitty, making it easier to replicate her charming appearance. Throughout this guide, we'll also provide insights on coloring and adding personal touches to your drawing, ensuring that your rendition of Hello Kitty is unique and special.
By the end of this article, you will not only know how to draw Hello Kitty but also gain confidence in your drawing abilities. So grab your pencils, paper, and some colors, and let's get started on this creative journey!
- Shred Happens Understanding The Importance Of Document Shredding For Your Security
- Kevin Durant Hair A Deep Dive Into His Iconic Hairstyle
Table of Contents
- 1. Understanding Hello Kitty: A Brief Overview
- 2. What You Will Need to Draw Hello Kitty
- 3. Step-by-Step Guide to Drawing Hello Kitty
- 3.1. Drawing the Head
- 3.2. Adding Facial Features
- 3.3. Drawing the Body and Clothes
- 3.4. Finalizing the Drawing
- 4. Tips for Coloring Your Hello Kitty Drawing
- 5. Common Mistakes to Avoid
- 6. Conclusion and Next Steps
1. Understanding Hello Kitty: A Brief Overview
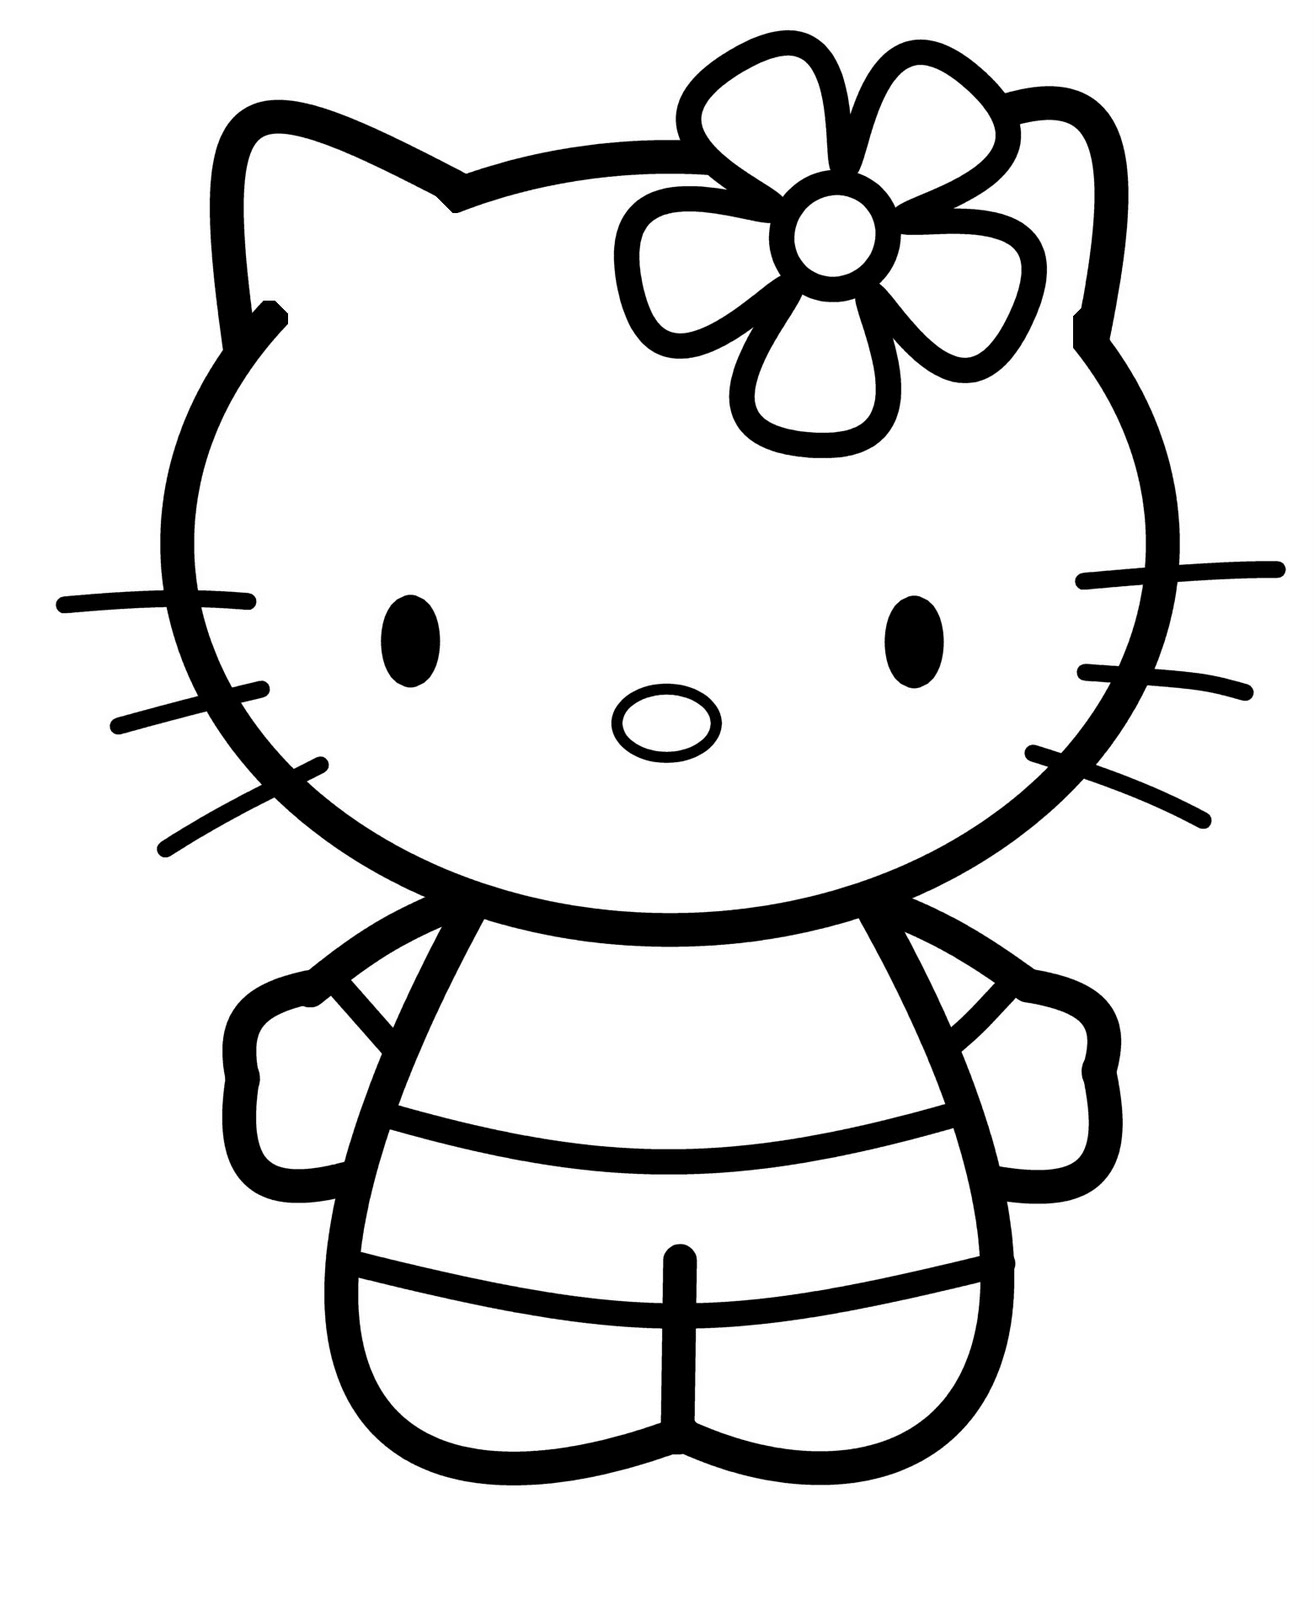
Hello Kitty, created by the Japanese company Sanrio in 1974, is a fictional character that represents a cute cat with a simple design. She is known for her iconic bow and lack of a mouth, which allows fans to project their feelings onto her. Hello Kitty has become a global phenomenon, appearing on countless products and in various media formats. Understanding her design and characteristics is essential for accurately drawing her.
2. What You Will Need to Draw Hello Kitty
Before we begin the drawing process, it’s important to gather the materials you’ll need. Here’s a list of supplies that will help you create a beautiful Hello Kitty drawing:
- Pencil
- Eraser
- Black fine-tip marker or pen
- Colored pencils, markers, or crayons
- Drawing paper
3. Step-by-Step Guide to Drawing Hello Kitty
3.1. Drawing the Head
To start drawing Hello Kitty, begin by sketching a large oval shape for her head. Make sure the top of the oval is slightly wider than the bottom, giving it a rounded appearance. This will serve as the base for her face.
- Understanding Abi From My 600 Lb Life A Journey Through Weight Loss And Life Transformation
- Nicki Minaj Young The Rise Of A Rap Icon
3.2. Adding Facial Features
Next, it's time to add Hello Kitty's facial features. Follow these steps:
- Draw two small oval shapes for her eyes, placing them near the top of the head.
- Add a small triangle for her nose, centered between the eyes.
- Draw six whiskers on each side of her face, three on the left and three on the right.
3.3. Drawing the Body and Clothes
Now, let's move on to her body. Start by sketching a small rounded shape below the head for her body. You can then add a simple dress by drawing two curved lines from the shoulders down, creating sleeves. Finish off by adding a bow on her left ear.
3.4. Finalizing the Drawing
Once you are satisfied with your sketch, use a black fine-tip marker to outline your drawing. After the ink dries, erase any pencil marks, ensuring a clean look. This is also the time to add any additional details or personal touches.
4. Tips for Coloring Your Hello Kitty Drawing
Coloring is an important part of the drawing process. Here are some tips to enhance your Hello Kitty artwork:
- Use soft colors like pink or pastel shades for her bow and dress.
- Color her face and ears in a light cream or white shade.
- Experiment with different color combinations to make your Hello Kitty unique.
5. Common Mistakes to Avoid
As with any drawing, beginners may encounter some common pitfalls. Here are a few mistakes to watch out for:
- Overcomplicating the design—keep it simple!
- Incorrect proportions—use reference images if needed.
- Skipping the sketching phase—always start with light pencil strokes.
6. Conclusion and Next Steps
In conclusion, drawing Hello Kitty is a fun and rewarding experience. With the steps outlined in this guide, you can easily create your own version of this beloved character. Remember to practice regularly and don’t be afraid to add your own creative touches. If you enjoyed this article, please leave a comment below, share it with friends, or check out our other art tutorials!
We hope you found this guide helpful in your artistic journey. Happy drawing!


Detail Author:
- Name : Adolfo Monahan
- Username : sauer.eleonore
- Email : little.trycia@yahoo.com
- Birthdate : 1970-06-16
- Address : 8045 Carlotta Plains Elinoreton, PA 95425
- Phone : (731) 787-5784
- Company : Brown, Marquardt and Senger
- Job : Watch Repairer
- Bio : Illum non aut sed distinctio nihil. Sit maxime impedit sapiente occaecati nihil suscipit dolorem. Enim eos aut et sequi.
Socials
tiktok:
- url : https://tiktok.com/@isaiah_abernathy
- username : isaiah_abernathy
- bio : Repellat numquam in rerum temporibus voluptatum consequatur sapiente veniam.
- followers : 4757
- following : 529
facebook:
- url : https://facebook.com/abernathyi
- username : abernathyi
- bio : Ab fugit iste dolores dolores. Rerum consequuntur non consequatur.
- followers : 2227
- following : 1843
instagram:
- url : https://instagram.com/abernathyi
- username : abernathyi
- bio : Ipsam sed modi sit quisquam sunt. Ut et sint nihil aliquid.
- followers : 2435
- following : 2436
twitter:
- url : https://twitter.com/abernathyi
- username : abernathyi
- bio : Eveniet optio eaque quam mollitia maxime saepe. Aspernatur rerum non saepe. Et et consequatur cumque soluta sed ut.
- followers : 4008
- following : 1122
linkedin:
- url : https://linkedin.com/in/abernathyi
- username : abernathyi
- bio : Provident a explicabo unde porro.
- followers : 4679
- following : 721

